Using Hugo to Build this Site
Since this was my first experiment with Hugo, I thought I’d blog about it a little.
After many years working with off-the-shelf, custom-built and even headless CMS I wanted to try using a static site generator. Hugo has gained popularity as one of the leaders in this space and had a good assortment of pre-existing templates allowing me to get something off the ground quickly. As a bonus, I was excited to get a little exposure to the Go language.
Installing Hugo
Getting Hugo installed was easy. I’m running on a Mac so I did the installation with homebrew. (I already had VS Code with the Azure Storage extension installed which are the other tools I’ll use below.)
brew install hugo
Then I created my site using Hugo.
hugo new site personal-website
cd personal-website
I liked the Hermit theme and followed the guidance to include it in my project as a Git submodule.
# Download the theme
git init
git submodule add https://github.com/Track3/hermit.git themes/hermit
I ran into a little gotcha where I needed to overwrite the website config.toml file with the one from the Hermit exampleSite directory in order to get the site to run. I was initially unsuccessful trying to apply TOML settings piecemeal and ended up just modifying the Hermit config.
Developing content with Hugo
Once everything was set I created my first post:
hugo new posts/building-this-site.md
I’m fuzzy on what this command is doing, but I’m guessing it’s not doing much more than cloning the appropriate template to the specified file location.
Content authoring seems easiest to do in Markdown, although HTML is apparently an alternative. I’m not looking to do any layout-intensive work at the moment so Markdown is a great fit for me.
To view my work I started the in-memory Hugo server in draft-mode to show in-progress posts:
hugo server -D
The nice thing about the local Hugo server is that changes to content are reflected almost instantly in the browser (running at http://localhost:1313/).
My workflow was to have the Markdown content open in VS Code and the same page open in Chrome. This way I was essentially viewing a live preview as I typed. There were a couple of times when it felt like my changes were not reflected on the site so I had to stop and restart the server, but this process is almost instantaneous so it wasn’t a big deal.
Probably the biggest challenge I had when authoring was figuring out how to include images–the guidance here was a little unclear. What I settled on was adding a folder to the “static” directory called “img” and referencing images in my posts like this:
The contents of the static directory get published to the site root so it’s not necessary to include it in the path. I feel like I’d rather have my images more logically associated with the referencing content, but once I get used to it I imagine this approach will feel more natural.
Page properties are handled in the front matter at the top of each file. Once the content was at the point where I was happy with it, publishing was just setting the front matter draft flag to false and running the hugo command.
---
title: "Building This Site"
date: 2019-10-16T12:18:37-07:00
draft: false
tags:
  - hugo
  - azure
---
Interestingly, the front matter defaults to YAML while the site itself is configured with TOML. It’s easy enough to switch back and forth between the two, but it’s curious that they didn’t pick one given how similar they are.
Deploying my new site
I chose to deploy the site to Azure Storage and use a Cloudflare proxy to provide security and performance as I’ve had a good experience with this approach in the past.
Getting everything set up was pretty easy:
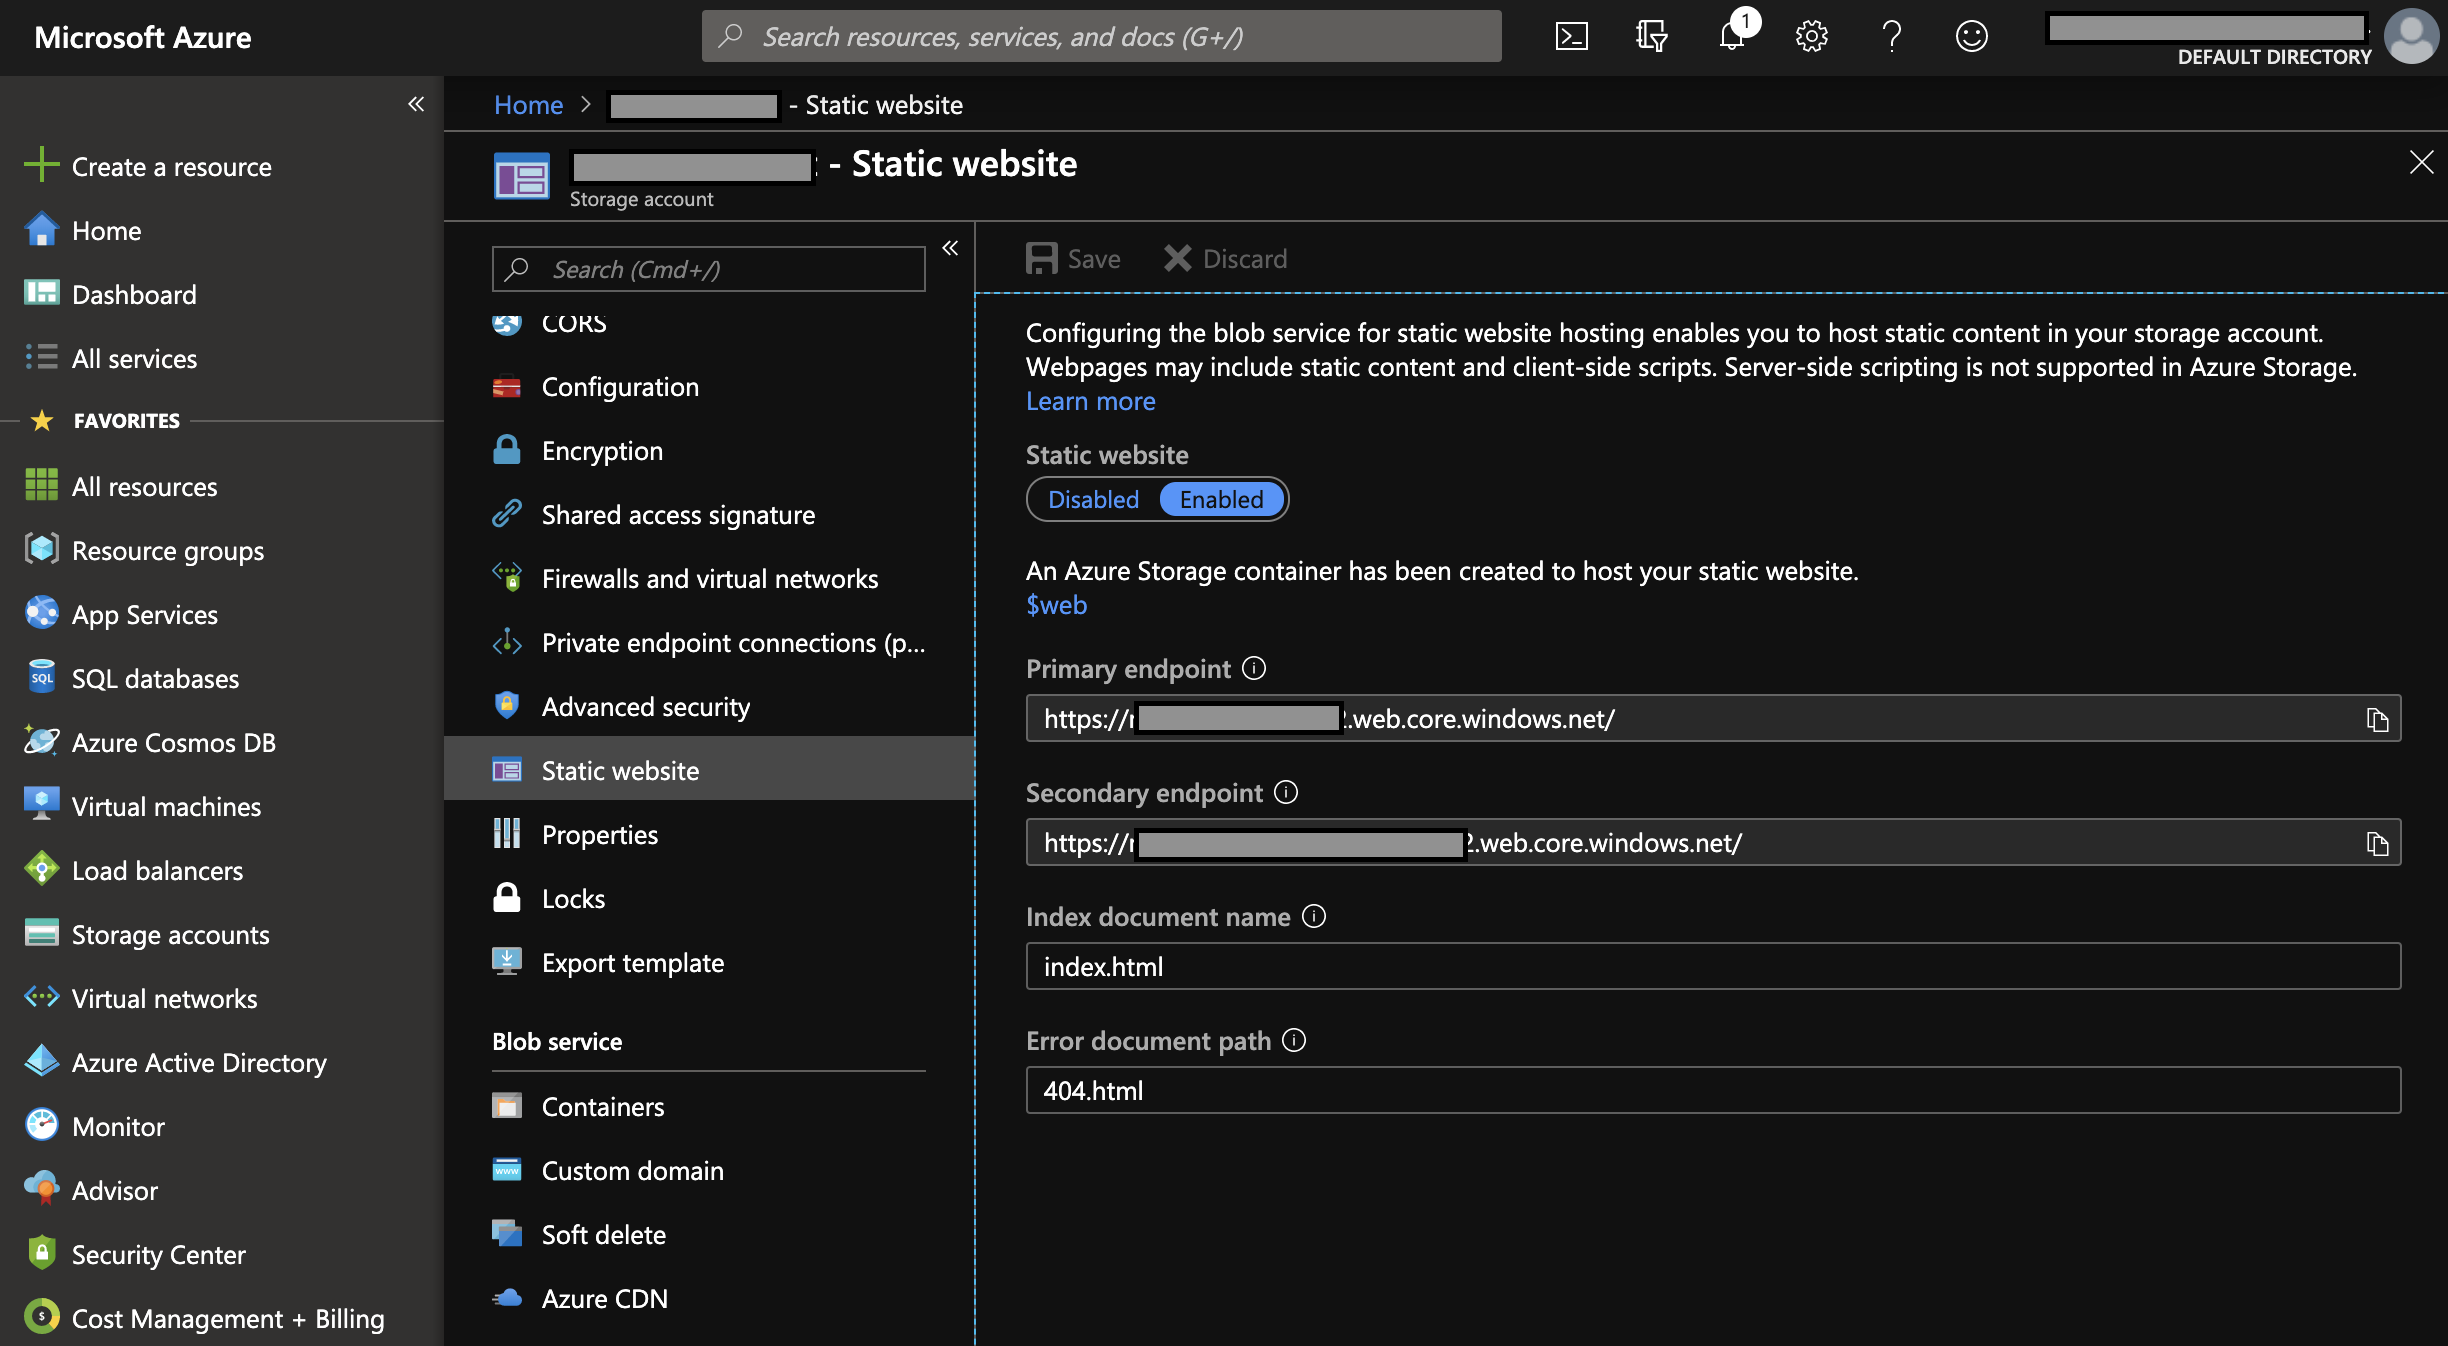
- First, I created a new storage account from the Azure Portal (web UI) and enabled the “Static website” option.
- I grabbed the endpoint path (in the format: [my_storage_account].[zone_number].web.core.windows.net) and went over to Cloudflare.
- Here I created a CNAME for the www pointing to this endpoint.
- Next I toggled the newly created entry from “Proxied” to “DNS only” (you need to do this in order for the next step to work).
- Then back to the Azure Portal to the Custom Domain section under Blob service where I entered my custom domain and hit “Save” to get Azure to verify the DNS record.
- Lastly, back to Cloudflare to turn the Proxy back on.

Deployment is quite straight-forward. Once the content is ready to go I run the ‘hugo’ command to build the state site and then push it to production using Azure Storage tools. This consists of a right-clicking on the “public” folder, selecting “Deploy to Static Website”, and choosing the name of the Storage Account to deploy to.

Some odds and ends
With everything up-and-running my workflow now is:
- Use the ‘hugo new’ command to create a new Markdown file
- Author content and preview locally
- Change the draft flag to ‘false’
- Run ‘hugo’ and right-click deploy
- Run git commit and push
For a personal blog with a single developer/author (me!) this simple approach to DevOps makes the most sense. However, it would be simple enough to create a few bash scripts using the Hugo and Azure CLI to automate this process.
My .gitignore just excludes .DS_Store files. I thought about modifying it to exclude generated output like the public folder from source control. But for the time being, it’s kind of nice to be able to easily see a snapshot of the site at any given point in time.
Final Thoughts
Overall, this is a pretty developer-centric version of content management. It’s not for everyone. But the workflow is easy, it’s fast, and everything used to get this working was free.
That said, it’s also pretty easy to see where the process wouldn’t scale. If I were to have multiple authors on this site or be doing daily content updates I would probably want a lightweight CMS running on top of this like Netlify or Forestry.
The content authoring process wasn’t quite as smooth as I would have liked either. Including images in my content felt kludgy and I didn’t even try more complicated media types. At some point, I might want other bells and whistles like spell-check or some workflow/approval steps. Presumably, some of those static-site CMS tools could fill those gaps.
Those complaints aside, I’m pretty impressed with Hugo. What jumps out the most is the speed in every respect–how fast it is to author new content and how fast it is for end-users. I’m excited to learn more about Hugo as I post more content and may revisit some of these thoughts as I do.